Question Forms
Add your own questions to the booking form so you have what you need before the meeting.
Every booking form asks for a name and an email. A question form adds your own questions to a specific event so you have what you need before the meeting. Answers appear in your calendar invite, confirmation email, and as merge variables in workflows.
1. Open The Event Editor
Open the event type you want to add questions to. Click the Questions tab, and either start from one of your saved forms or add questions directly.
2. Click + Add Question
A new question slot appears. Fill in:
- Label. What the invitee sees (“Company name,” “Budget range”).
- Type. Short text, long text, dropdown, radio, or checkbox (see article 8.3).
- Options, where the type needs them.
- Required? Toggle on if the booking should not be allowed without an answer.
3. Order The Questions
Drag the questions into the order you want. Top-to-bottom on the editor equals top-to-bottom on the booking form.
4. Manage Forms Centrally On The Question Forms Page
Click Question Forms in the sidebar to manage forms outside of any single event: click + New Form, give it a name, add fields with + Add Field, and Assign it to one or more event types. Editing a form here updates every event it is assigned to.
5. Common Questions
- “What is your company?”
- “What is your goal for this call?”
- “How did you find me?”
- “What is your budget?”
- “Anything I should know before our call?”
6. Save Or Publish
Click Save at the top of the event editor (or publish the step on a live event). The questions are now part of the booking form, appearing after the invitee picks a time. Required questions must be answered before the Confirm button works.
7. How Answers Are Used
- Calendar invite description includes all answers.
- Confirmation email to invitee includes all answers (formatted block).
- Confirmation email to host includes all answers (formatted block).
- Workflow merge variable
{{intake_answers_section}}includes all answers. - Per-question merge variables like
{{intake.company}}and{{intake.budget}}reference individual answers.
8. Keep It Short
Keep it to three or four questions; each extra question lowers completion. Put the most useful question first.
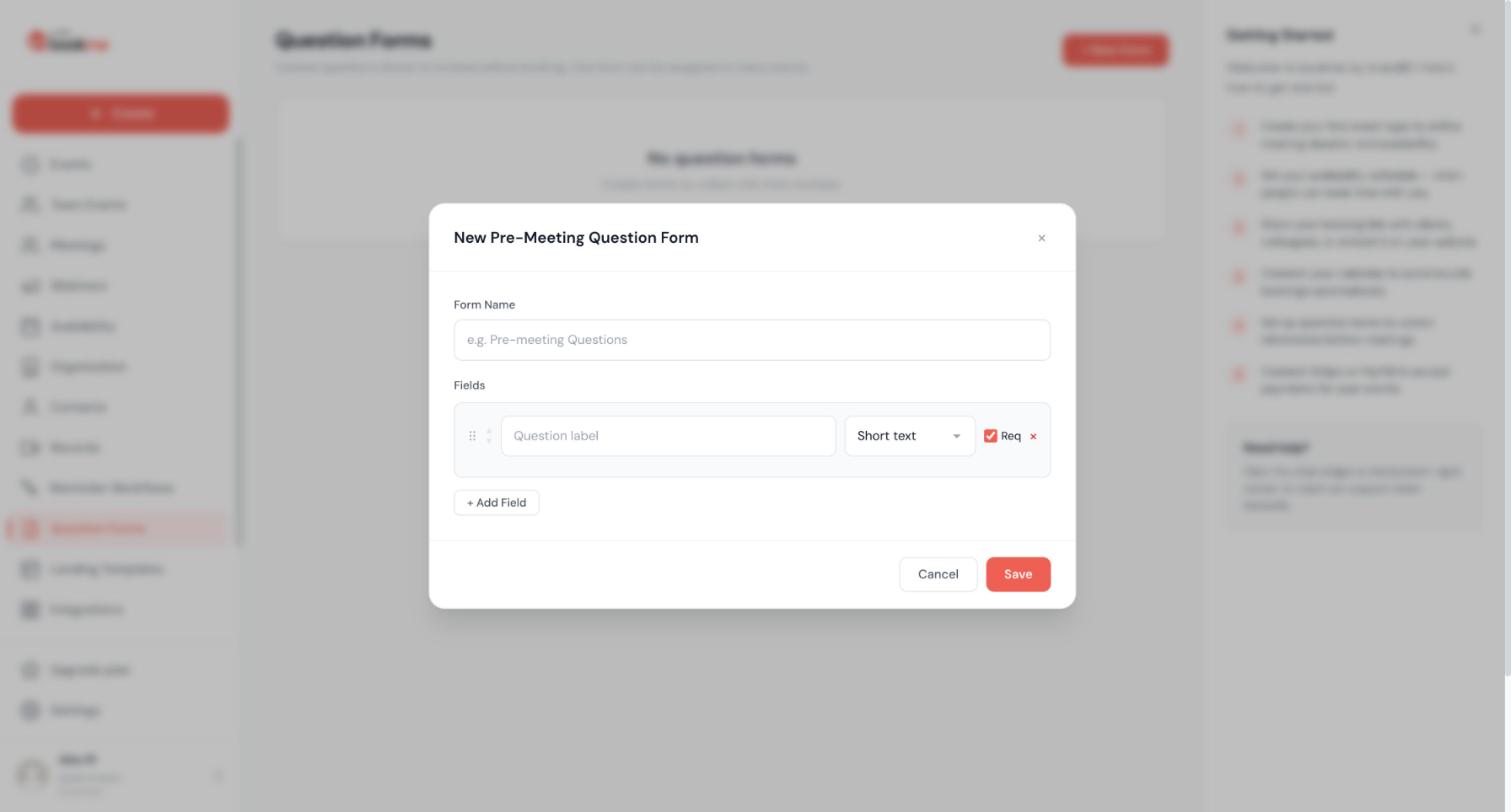
Each question has a Required switch. Conditional questions (show one question only if another was answered a certain way) are not available.
1. Required Or Optional
In the wizard’s Questions step or in the form editor, toggle Required on the question. Required questions are marked with an asterisk on the booking page and block the Confirm button until answered. Optional questions can be left empty.
2. Conditional Logic
Not available. Work around it with:
- A dropdown or radio question that captures the branch (“What is this about?”) and an optional long-text question for details.
- Separate event types for genuinely different flows, each with its own form.
3. Checkboxes
A required checkbox question needs at least one option ticked. Use it for consent (“I agree to be recorded”) by giving it a single option.
Five question types cover most intake needs. File uploads, dates, and phone-formatted fields are not available; use a text field for those.
1. Short Text
A single line. Best for names, companies, a phone number, a URL, a short phrase.
Example: “What is your company name?”
2. Long Text
A multi-line box. Best for open-ended questions where invitees may write 1-2 paragraphs.
Example: “Tell me about your project.”
3. Dropdown
One choice from a list (minimum two options). Budget range, company size, topic.
Example: Company size with options “Solo,” “Small (2-20),” “Medium (21-200),” “Large (200+).”
4. Radio
One choice, all options visible. Best for two to four options.
Example: “New client / Existing client.”
5. Checkbox
Several choices from a list. Areas of interest, consents.
Example: “Which channels are you active on?” with options “Instagram,” “TikTok,” “YouTube,” “LinkedIn.”
6. How Answers Are Stored And Shown
Each answer is stored with the question’s label. Checkbox answers are joined with commas in emails and on the Meetings page. Answers are plain text; links typed into a text field are shown as text.
Answers travel with the booking so you have them wherever you look before the meeting, including your calendar invite, your confirmation email, and the invitee’s confirmation email.
1. In Your Calendar Invite
When bookme writes the booking to your connected calendar (Google, Outlook, iCloud), the event description includes a Form Responses section listing each question and answer, so they are on your phone during the meeting.
Example calendar event description:
“` Booking with Sarah Chen Time: Friday, July 15 at 2:00 PM EDT Location: Zoom
━━━ Form Responses ━━━ What is your company? Acme Inc.
What is your goal for this call? Discussing pricing for our team plan.
How did you find me? Referral from James Li.
━━━ Manage Booking ━━━ Reschedule: [link] Cancel: [link] “`
2. In The Host Confirmation Email
The email you receive on booking includes the same Form Responses section, styled with each label bolded.
3. In The Invitee Confirmation Email
By default, the invitee also sees their own answers in the confirmation. This serves as a record.
If you do NOT want the invitee to see their answers reflected back (e.g. for very sensitive questions), turn off Include answers in invitee confirmation in the event editor’s Questions tab.
4. On The Meetings Page
Open the booking; the answers are shown under What they told you, next to the invitee’s note. For team events every attending host sees them.
5. In Workflow Emails
Use {{intake_answers_section}} to render the full block in any workflow email, for example in a 1-hour reminder you send yourself. Or use per-question variables like {{intake.company}} and {{intake.budget}} for individual answers.
6. Formatting Of The Block
bookme formats the answers as:
- Question label (bold).
- Answer text on the next line.
- A blank line before the next question.
This keeps long answers readable.
7. Empty Answers
If a question was optional and the invitee left it blank, that question is omitted from the section entirely (not shown as “Q: blank”).
8. Guests And Privacy
Guests you add to a meeting, and bookme users who see a meeting as a guest, never see the invitee’s answers or note. Only hosts do.
No. Routing forms (a questionnaire that sends people to different event types or hosts) are not part of bookme. Here are the ways to get a similar result.
1. Let The Page Do The Routing
Your booking page lists all your live events. Name and describe them so the right person picks the right one (“Existing customers: support call” versus “New here? Intro call”).
2. Round-Robin For Team Distribution
If the goal is to spread bookings across a team, a round-robin event does that automatically, without a form.
3. Direct Links Per Audience
Share a different event link with each audience (your website’s pricing page links to the sales call, your newsletter links to office hours). Question forms then only collect context.
4. Qualify After Booking
Use a required dropdown (“Are you a current customer?”) and act on the answer from the Meetings page: reschedule, add a colleague as a guest, or cancel with a note.
There is no export button for answers or bookings yet. Use a webhook to collect them as they come in, or copy them from the Meetings page.
1. Live Export With A Webhook
Add a webhook action to a “when an event is booked” workflow and point it at a Zapier, Make, or n8n hook that appends a row to a spreadsheet. The webhook payload carries the booking id, event, times, and the invitee’s name and email; fetch the answers by opening the booking or by keeping the new-booking email, which contains them.
2. From Emails
Every new-booking email contains the answers. Filtering those emails into a folder gives you a searchable archive at no cost.
3. From The Meetings Page
Open any booking, past or upcoming, and read the answers under What they told you. The Contacts page lists every person who has booked you, with their booking count and last meeting.
4. Requesting An Export
For a one-off full export of your bookings, write to [email protected] from your account email.
Still stuck? We’re happy to help.
Create your bookme account, see pricing, or reach out to support directly.